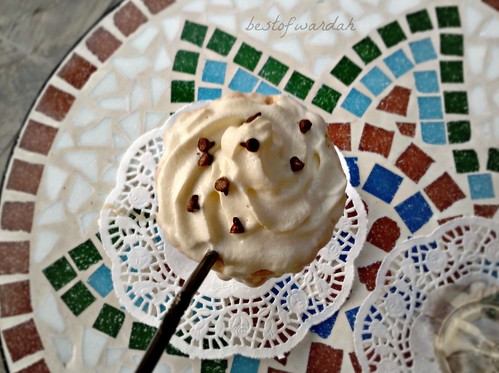
Wednesday, November 7, 2012

Sweet Crêpes


So, I think I damaged my sense of self-control sometime during the past month. In between juggling school, work, and blogging, my self-control just disappeared. When I'm not eating my mom's bomb pancakes or hash brown for breakfast, it's these amazing crêpes.

Saturday, November 3, 2012

Salted Caramel Hot Chocolate


If there was one reason I was wishing for the cold weather to come, it was definitely to drink a steaming cup of hot chocolate again. I've always loved to snuggle up in a blanket with a cup of hot chocolate and a good book while watching the rain outside my window. Now that the cold weather is starting to come to SoCal, I can finally do this again!

Saturday, October 27, 2012

Stuffed Peppers


Hello everyone!

If there's any food that screams fall, it has got to be this colorful stuffed peppers dish. Traditionally, when thinking of fall foods, the things that come to mind are pumpkins, spices, and caramel flavored drinks - on a side note, I can't wait to try the salted caramel mocha at Starbucks. But, I think the colors in this dish really remind me of fall, especially now that the leaves have started to change colors.

Monday, October 22, 2012

Zucchini Muffins and Fall Foods


Hello everyone! It's been a while, but I'm back. :)

Zucchini is a funny vegetable. Not only does seeing it always compel me to pronounce it as zu"ch"ini, but it's also very versatile. Zucchini has been used in all kinds of foods from savory dishes to desserts. I have always been a big fan in zucchini in savory dishes, such as my zucchini and garlic fettuccine pasta, but I decided that I must try it as a sweet dish too. Now, I did cheat a little and make my muffins more savory because I knew I would be eating these muffins with my dinner, but this recipe can easily be converted into a more sweet muffin.

Now that fall is coming around and the trend of "fall foods" is getting bigger, this is just the perfect muffin to have with your favorite mug of coffee (or in my case, frappuccino). Leave a comment below telling me what your favorite fall food is and it might just be the star of my next food post!

Tuesday, September 25, 2012

DIY Paper Collage Painting

You may or may not know that I have been on a little break from school - my so-called "summer break," also known as the extremely short breather I get before being thrown back into the hectic schedule of a graduating senior. But in that short break, I decided to do one thing I missed doing all school year long - painting.

I always have loads of ideas for paintings but I'm never able to follow them through because of lack of time. I either have a paper to write, an exam to study for, research to do, or other boring university student stuff. So I definitely couldn't pass up this opportunity to try one of them out - a paper collage painting.

Here's how you can make yourself one of them too!

DIY Paper Collage Painting

Sunday, September 16, 2012

Rilakkuma Omurice

I enjoyed editing this picture far too much.
Hello everyone!

The word "cute" was never in my dictionary of descriptive words for foods. Desserts were the only exception... until I discovered the Japanese world of bentos. Bentos are basically meals packed in boxes. Usually, if the bentos are made for kids (or 16 year old sisters), they're all vamped up with "kawaii" (cute) things like animal shapes and hearts. Now, this specific dish isn't in a bento because I don't particularly have any bento boxes at home, but it still looked adorable.

Ever since I started school, from kindergarten all the way to university, I have been surrounded by Asians. So, it's no surprise that I'm quite familiar with and very appreciative of all sorts of Asian cultures from Chinese to Japanese to Korean. The kawaii culture of the Japanese has always been at the top of that list. I mean come on, who doesn't love Hello Kitty and all the other Sanrio characters?!

And the Rilakkuma or Relaxing (sleeping) bear character is no different. His adorableness is to an extreme. When I saw this tutorial for how to make Rilakkuma omurice, I knew I had to make it. And who better to make it for than my omurice-loving sister. Omurice is a Japanese rice dish made of rice cooked in ketchup and wrapped in an omelet.Yumm. Even my brother was fawning over Rilakkuma and his little friend.

Sunday, September 9, 2012

1 Wedding, 200 Cupcakes, and Thousands of Memories


Hello everyone!

Today's post is rather special. I'm not going to be sharing a recipe or a painting that I've done. Instead, I'm going to share with you one of the most precious memories of my lifetime - my sister's wedding.

Friday, September 7, 2012

Rosemary Shrimp Scampi with Fettuccine Pasta


Hello everyone,

If there's one thing you should all know about me, it's that I can't stand seafood. I don't know if it's the fishy smell, or the... okay, I know it is the fishy smell. You know, they do say that smell makes up half of your taste perception so there's not much I can do about it.

All of my childhood though, my mom made sure to give me an extra large helping of fish. She would watch me eat it until I finished every last bit. The only part I could ever manage to sneak to my cats was the skin, and I'm sure that too was only because she allowed it. The only seafood my mom couldn't make me eat was shrimp. I think I was ten when my mom brought home a bag of fresh shrimp from the grocery store. She was going to make shrimp chow mein or something equally amazing I'm sure. She asked me to shell it and clean it. I remember asking her what the weird smelling black string that I pulled out of the shrimp was. Lemme just say that I didn't eat the shrimp
chow mein that night and I haven't touched shrimp since then.

Thursday, August 30, 2012

Summer Avocado and Grilled Corn Salad


There are only a couple more weeks of summer left and I still have more summer recipes to share with you all! One of the recipes I've been really excited to share is a summer salad. Salad recipes are always fun to know because you can adjust any of the ingredients to your liking. This recipe is not only very healthy, but also very bright, colorful, and summery. My favorite ingredients in this salad are the avocado and grilled corn. The soft, rich avocado and aromatic corn just enhance the entire flavor of the salad.

The recipe is quite simple. Plus, you can play with the vegetables and vegetables until you reach your preference. Eat the end result with tortilla chips or even with a fork. It'll be delicious any way.

Friday, August 24, 2012

Brunch for le Mommies

 
My friend, K, called me up yesterday night and said, "Hey, our moms are hanging out tomorrow. Why don't we get together and make them a surprise brunch?" My response was obviously a "Yes!" I immediately loved the idea. We spent the next thirty minutes coming up with the perfect menu. And then, I spent the next three hours lying in bed planning how the event would go, and praying that I would fall asleep soon. Let me just say that I was still sleeping when K came over and had to pull me out of bed.

Saturday, August 18, 2012

Pink and Blue Geometric Ostrich Egg


Hello everyone!

It's been a while since I have posted about something that I have painted. More specifically, an egg that I have painted. So I decided to share an ostrich egg I recently painted as a gift for someone.

Tuesday, August 14, 2012

Baklava


Here's another recipe that calls for phyllo dough! Although we live in different states now, my sister Wardah and I both decided to use phyllo dough to create yummy pastries on the same day. While she made spanakopita, I chose to make baklava: the popular sweet, crispy pastry made with buttered sheets of dough layered with nuts and lightly sweetened with a honey syrup.

Friday, August 10, 2012

Spanakopita


Hello everyone!

Today's blog post is about an appetizer that my family and I love. A decadent spinach, feta, and cream cheese filled "pie" with layers of crispy, buttery phyllo dough crust. Do I have you interested yet?

Sunday, August 5, 2012

Tres Leches Cake


Hello everyone!

Tres leches cake is a cake that my family and I have been wanting to try for many weeks. Ever since my sister heard of it on Laura Vitale's Youtube show, she's been obsessing about how awesome it looked and how much she wanted to try it. When my mom told me she had invited my uncle's family over for dinner, I decided that it was the perfect opportunity for me to try this dessert.

Thursday, August 2, 2012

Starbucks Java Chip Frappuccino


Believe me or not, I have never enjoyed coffee. I just cannot handle anything with the bitter taste of espresso. Back when I was in high school, a friend took me to Starbucks one day. Overwhelmed with the variety of choices, and extremely unfamiliar with the taste, I just picked a drink that sounded cool - a "small" peppermint white chocolate mocha. Yet even after pouring in three packets of sugar and lots of creamer, my drink tasted so bad that I had to throw it away. That was the day I learned that I did not like coffee. Wait, scratch that, that was the day I decided that I did not like any Starbucks drink.


For many years after that, I got hot chocolate wherever I went. Then, in college, the Starbucks study sessions began and I was offered a sip of my friend's Frappuccino. Cowed, I told her my previous experience with the bitter drink. Long story short, I was then forced to try her drink. I completely fell in love with the frappe, and ever since then I have been ordering "tall" Starbucks frappes of all flavors every time I am in a 1 mile radius of a Starbucks coffee shop.

The Frappuccino that I find myself craving the most these days is the Java Chip Frappuccino. That is, I was craving it until yesterday. Unfortunately, I wasn't within a 1 mile radius of a Starbucks, and I just did not have the energy to drive any further for some coffee. I finally decided that I would just man up and make it at home. Lemme just say that I was not disappointed and neither will you be.


Java Chip Frappuccino
Serves 2

1 cup cold coffee (I make mine with instant coffee powder and milk)
2 scoops or 4 tablespoons coffee ice cream
2 tablespoons chocolate chips
2 tablespoons chocolate syrup or fudge
1 cup crushed ice
whipped cream, chocolate syrup, and mini chocolate chips as toppings (optional)

Scoop ice cream into blender. Resist licking the spoon or scoop before going back for the second scoop. Pour the chocolate chips in- yeah, you can eat the ones that fell onto the counter. Pour in the coffee. Put in the chocolate syrup. Again, resist licking the spoon until it's all in. Throw in  the ice. Blend all the ingredients together until you get a thick, icy mixture. Pour into two tall glasses and serve with whip cream and other toppings.


Yes, now you can attack it. Enjoy!

Saturday, July 28, 2012

Homemade Graham Crackers


Hello everyone!

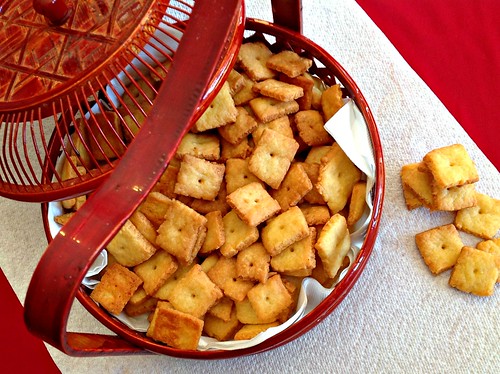
The second cracker I made for the Daring Baker challenge of this month was graham crackers. After I'd made the Cheez-its, I wanted to try something sweet. The first cracker type that came up when I Google-d sweet crackers were graham crackers and that definitely sparked an interest.

In my house, we always most definitely absolutely must have a box of graham crackers lying around all the time in case my family needs a quick cheesecake fix... which is quite often. When I saw the recipe for the graham crackers, I started wondering if I could make even the crackers for the crust of the cheesecakes from scratch. Wouldn't that be so cool? And the crackers for smores. Oh man, that would be heavenly.

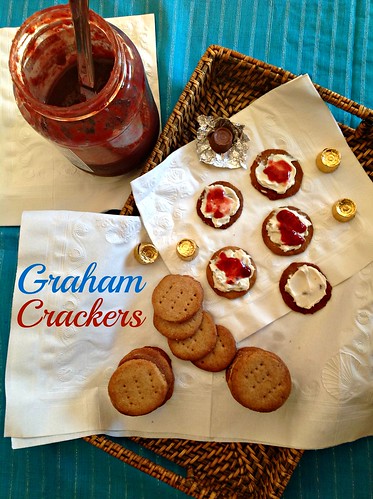
Needless to say, I ended up making the graham crackers and judging by my siblings, parents, and friends reactions, they were a success. All I can say is that as of now, there are no more graham crackers left.

My siblings loved the crackers with honey nut cream cheese and strawberry jam.

Homemade Graham Crackers
(Around 4 dozen crackers)

Ingredients
2 cups all-purpose flour
1/2 cup whole wheat flour
1/2 cup packed dark brown sugar
1 teaspoon fine grain sea salt
1/2 teaspoon cinnamon
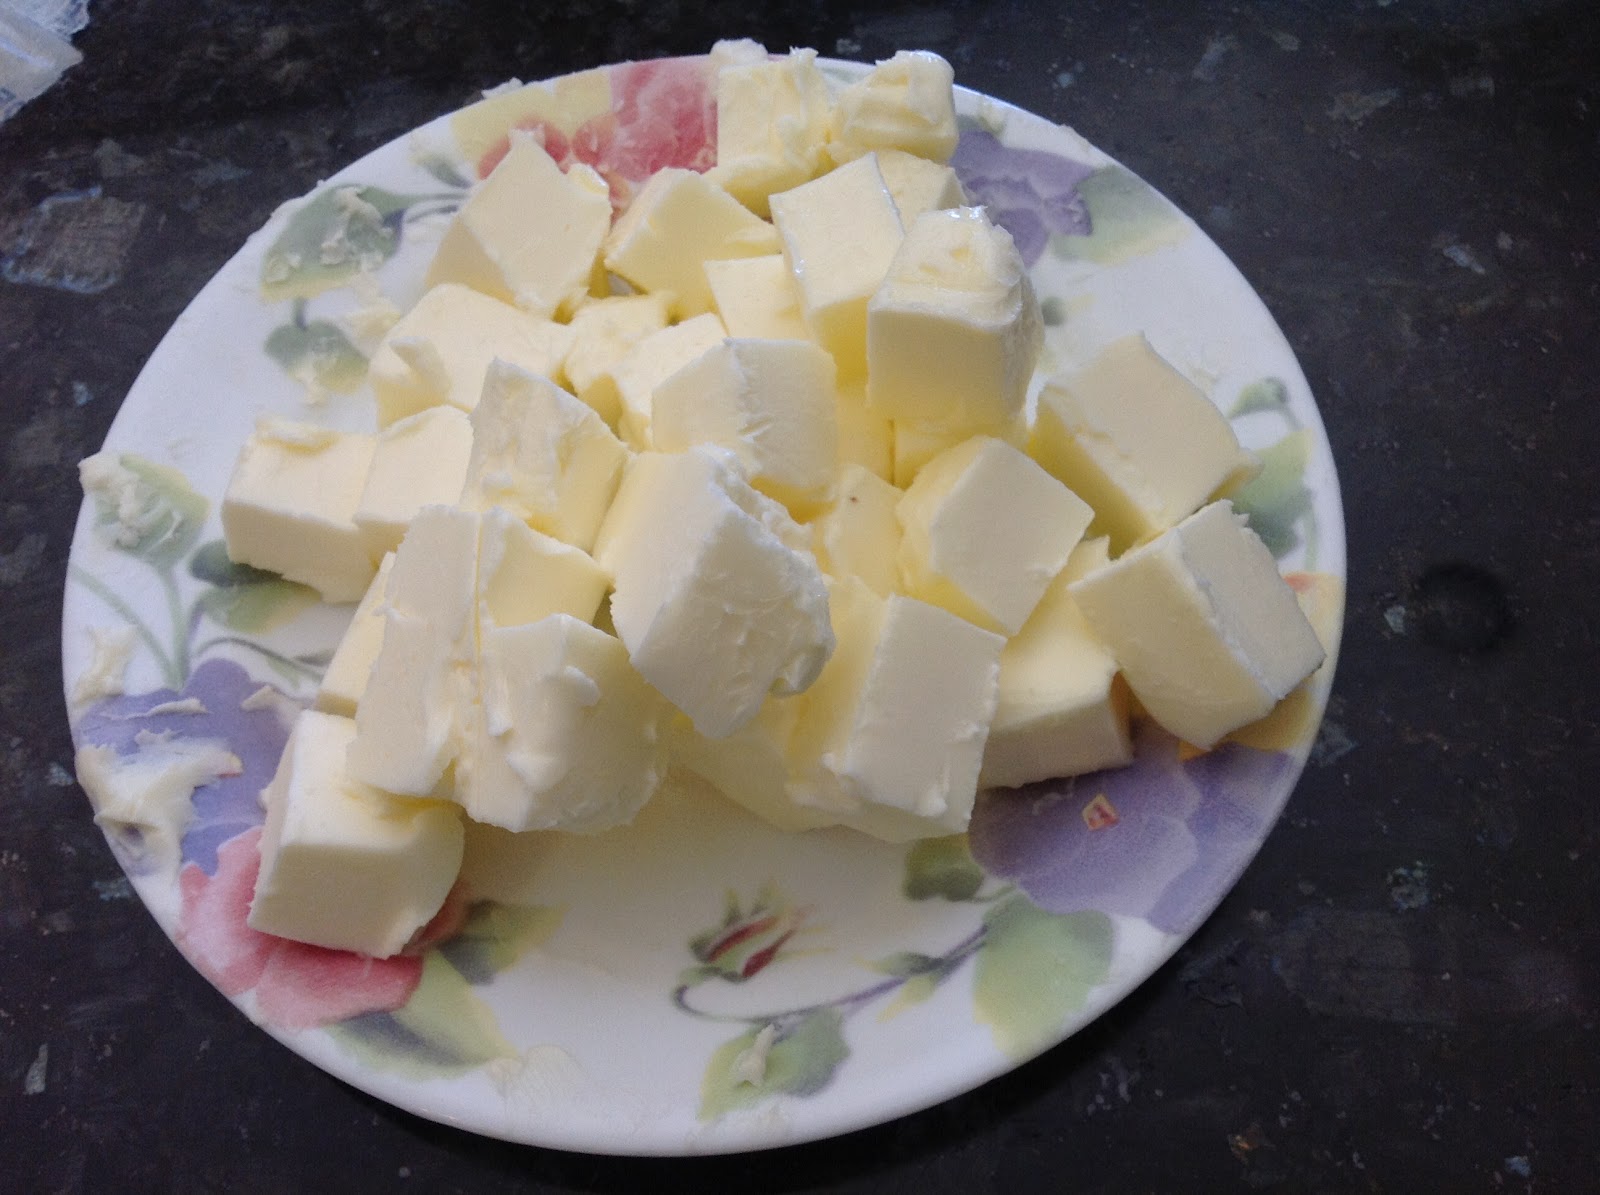
1 cup cold unsalted butter, cut into even cubes
1/4 cup honey
sugar and sea salt for sprinkling (optional)

Steps


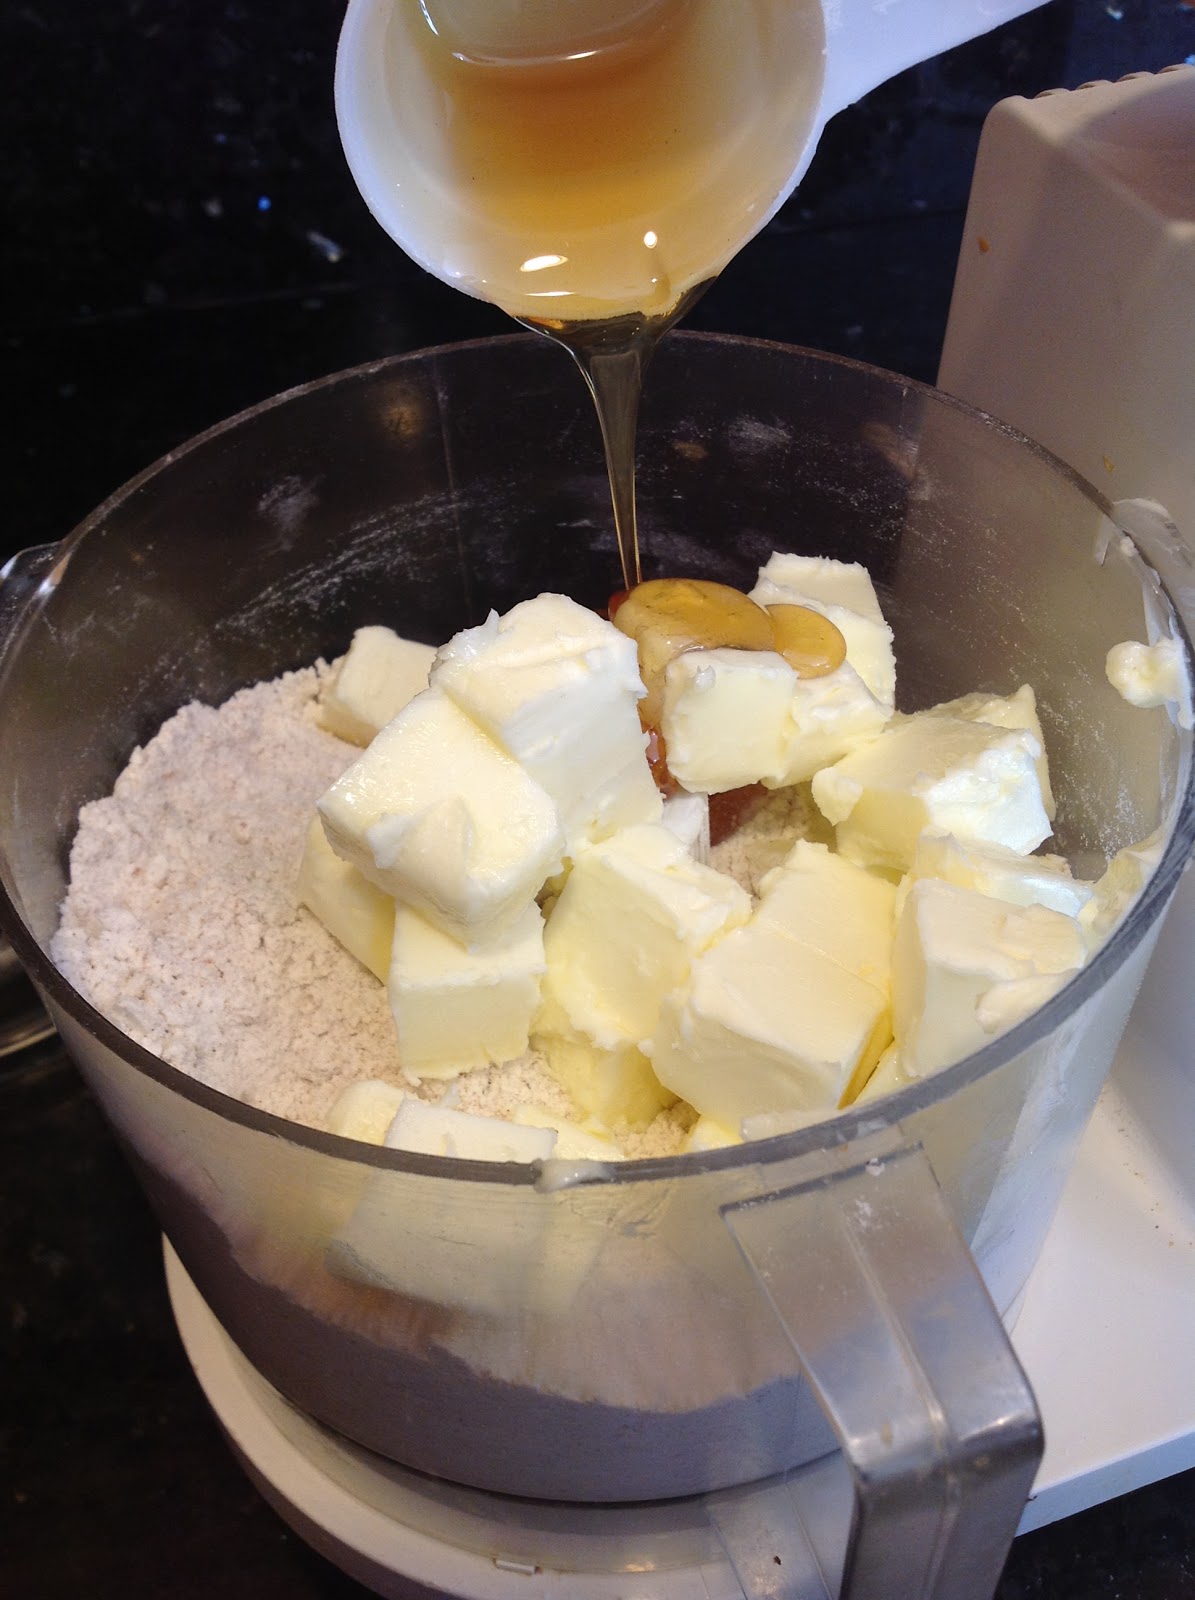
To a food processor, add all-purpose flour, whole wheat flour, dark brown sugar, fine grain sea salt, and cinnamon, pulsing to combine.


Add the butter and honey, processing until the mixture comes together. It will look crumbly at first, but will eventually moisten up and clump together.


Turn the dough out onto a work surface (I used my silpat) and form into a ball. Cut the ball in half then form each half into a log shape. Wrap each log in plastic and chill in the refrigerator for about 1 hour or freezer for about 15-30 minutes. You want the dough to be cold and slightly firm.

Preheat your oven to 350°F and place a rack in the center of the oven. Line two baking sheets with parchment paper or silpats.


Take one of the logs from the refrigerator, unwrap and place on a lightly floured work surface.
Using a knife, slice the log into 1/8" thick crackers. Pierce each cracker with a fork  or chopstick several times then sprinkle with sugar and sea salt (if using).


Transfer baking sheets to the refrigerator and chill for 15 minutes before baking. Bake for 13 – 14 minutes or until golden brown. Let the crackers rest on the baking sheet for 1 minute before transferring to a rack to cool completely. Repeat this process with the remaining log of dough.


Enjoy! Don't forget to follow me on Instagram @warif93!

Homemade Cheez-its!


For the July Daring Baker's Challenge, we had to make two different crackers. You could make any two crackers you like as long as you make them in two separate ways. So, unquestionably, the first thing that came to my head when I thought of what cracker to make was cheese. I mean, who doesn't love cheese? Now there are loads of other types of cheese-y crackers I could have made but Cheez-its were the first to come to mind.

One of the reasons why I was so excited to make Cheez-its specifically, is because I don't normally eat store bought Cheez-its because of religious dietary restrictions. The cheese used in the store bought variety contains enzymes and whey derived from animal sources. Though I haven't had store bought Cheez-its for more than a decade, I still have fond memories of snacking on Cheez-its and goldfish crackers as a kid. So, when I was given this chance to make the crackers using my own ingredients, I grabbed it.

(Warning! This next schpiel is mainly interesting to vegetarians and Muslims. ;D) Now, one of the most common questions I get asked is what cheese do I use - Tillamook cheese. The Tillamook brand of cheese uses only the freshest and fewest ingredients in all their cheeses. They also use microbial sources to culture their milk. So, if you're worried about which cheese is okay for Muslims to use, never fear, Tillamook is here! ;)

Homemade Cheez-its
(Makes approximately 15 dozen crackers)

Ingredients
1 8-oz block extra sharp cheddar cheese, coarsely shredded
1/2 stick unsalted butter, at room temperature
1 teaspoon kosher salt
1 cup unbleached all purpose flour
2 tablespoons ice water

Steps

        
In the bowl of a stand mixer fitted with the paddle attachment, mix the cheddar, butter, and salt until soft and homogenous. 


Add the flour and mix on low speed; the dough will be dry and pebbly. 


Slowly add the water and continue to mix as the dough coalesces into a mass


Pat the dough into a disk, wrap tightly with plastic wrap, and refrigerate for at least an hour.

 
Preheat the oven to 375˚. Line two baking sheets with parchment paper. Divide the dough into two pieces and roll each into a very thin (1/8 inch or less) 10×12-inch rectangle. 


Using a fluted pastry cutter (or just a plain old knife like I did), cut the rectangles into 1-inch squares, then transfer to the baking sheets. Use the tip of a chopstick to punch a hole into the center of each square.


Bake for 17 minutes or until puffed and browning at the edges. I found that in my oven, I only had to bake it for around 10-12 minutes so this time can be very subjective. Watch carefully, as the high fat content of the crackers makes it a fine line between golden delicious and burnt. Immediately move the crackers to racks to cool.


Enjoy! Also, I've made an Instagram, finally! Don't forget to follow me @warif93

DB July Challenge: Crazy For Crackers

Hello everyone!

Our July 2012 Daring Bakers’ Host was Dana McFarland and she challenged us to make homemade crackers! Dana showed us some techniques for making crackers and encouraged to use our creativity to make each cracker our own by using ingredients we love.

The two crackers I chose to make were graham crackers and Cheez-its! I can assure you that both crackers were loads of fun to make.

You can find the posts on the crackers and their recipes here:


So the main rule of this challenge was to make these crackers by using different rolling and shaping methods for each cracker. I decided to go with the traditional hand rolling and non-traditional icebox shaping methods.


Here I rolled out the dough for the Cheez-its using a rolling pin and cut square shapes using a knife.


For the graham crackers, I formed the dough into a log shape and chilled it. Then I cut it into crackers by slicing it thinly. This is the non-traditional icebox method of forming the crackers.

Though both methods worked great for me, I can definitely say that I prefer the icebox method. It was a lot faster and less frustrating (no crackers tearing apart the second I try to lift them onto the tray). However, the crackers of the other method were a lot more clean cut and consistent in shape and thickness. I'm sure they would have been even more so if I had used a cookie cutter.

I have to say that I really enjoyed the Daring Baker challenge of this month. It was super fun and something that people normally don't even think of doing. I mean, who makes their own crackers these days? But the results were pleasing and the process was fun. I know I'll definitely be making those Cheez-its again!

© Best of Wardah. Made with love by The Dutch Lady Designs.