

Here are simple instructions on how to make one of the easiest cakes ever. Not only is it put together in a jiffy (with absolutely no baking or cooking involved), but with its high-contrasting stripes of dark wafers and whipped cream, this cake is stunning and it tastes delicious too! But you have to be careful not to eat too much of the Oreo pudding during preparation, or you won't have enough left to frost the cake with!
My little sister Hajerah would like to be credited for making the beautiful cake displayed in these pictures ;)
Alright, on to the recipe!
Oreo 'n' Chocolate Wafer Cake
- 1 package Nabisco Famous Chocolate Wafers (9 oz)
- 2 cups heavy whipping cream
- 2 tbsp sugar, preferably powdered
- 1 package instant Oreo pudding mix (4.2 oz)
- 2 cups cold milk


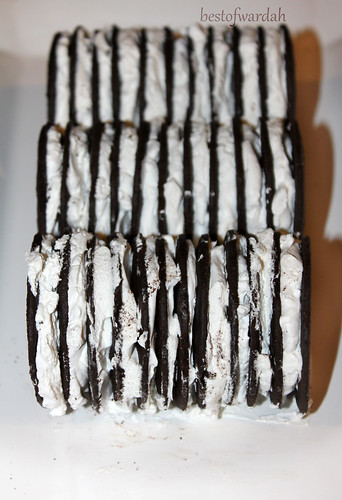
STEP 2: Spread two teaspoons of the cream on one side of a wafer and stick another wafer on the cream to make a sandwich. Repeat spreading cream and stacking wafers until you have a stack of 12 chocolate wafers, with cream in between them. Lay the stack on its side on a serving tray.

Repeat the process of stacking 12 wafers to make two more stacks and you will have three stacks of wafers lying side-by-side on the tray. There should not be any space between the stacks.
Take the remaining cream, spread it on the leftover wafers, and consume promptly. Consider this a test to find whether your wafer cake will be a success or not.

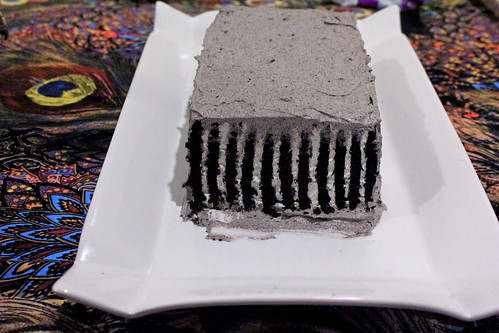
Again, consume the remaining pudding. This is to keep you going for a bit, because the wafer cake must be refrigerated for a couple hours before you can eat it! Refrigeration is necessary to make the chocolate wafers soft and cake-like and to set the Oreo pudding.
This cake can be decorated or garnished however you like. My sister wanted to keep it plain and simple because once the cake is cut, the stripes are eye-catching all on their own! Oh yes, don't forget that you must cut the slices perpendicular to the wafers if you want to see this beautiful display in each slice of this yummy cake :)
Enjoy this super-easy chocolatey cake with a glass of milk or with friends, or both. Your friends will love you for sharing it!


I'd like to say that I had the privilege to eat this and it was super duper amazing and delicious! :D
Amazing
Post a Comment