Sunday, March 18, 2012

Linguine with Mushrooms and Garlic Cream Sauce


Hello everyone!

So, I've been pretty busy in the kitchen lately.  I've been cooking, baking, and cleaning all this week.  I've tried a couple new recipes and this one is definitely my favorite! To top it all off, it's actually pretty simple.  The end result is deliciously creamy (hence the "cream sauce" in the name), and the flavorful mushrooms really tie in the different tastes of the cream, bell pepper, and cheese.  And let me tell you, the smell once you put in the whipping cream and cheese is heavenly.

The following recipe is a slightly tweaked version of a recipe I found online.  So sit tight and enjoy while I go through the steps.

Linguine with Mushrooms and Garlic Cream Sauce
Ingredients
3 tbsp butter
8 oz mushrooms (sliced)
1/2 red bell pepper
1/2 green bell pepper
4 garlic cloves (minced) 
ground pepper (fresh)               
12 cup cream (whipping)
2 tsp. salt
1 package of linguine
2 oz cheese (shredded parmesan)
basil (optional)

Melt butter in heavy large skillet over medium-low heat. Add mushrooms, garlic, and generous amount of pepper. Cook until mushrooms exude their juices, stirring occasionally, about 5 minutes.


Add cream and simmer until sauce thickens slightly, about 3 minutes. Season with salt.


Meanwhile, cook pasta in large pot of boiling salted water as directed on package. Drain well. If it is going to be set aside for a while, make sure to oil the pasta or else it will stick and harden.


Add pasta and cheese to sauce and stir until cheese melts.


Sprinkle with more cheese and serve.


Enjoy!


Saturday, March 10, 2012

Sticky Date Cakes


Hello everyone!

I'm finally back with a new post, and this time it's a recipe!  I've been wanting to do something special for my mom as a little way to appreciate everything she does for me.  When I came across this recipe for sticky date cakes, I knew it was the perfect way to do just that.  My mom loves dates, honey, and coconuts, and this recipe has an abundance of all three.  So sit tight and I'll take you through the recipe.

Sticky Date Cakes (Serves 6)

Ingredients


Cake:
1/2 cup shredded coconut
1/2 cup brown sugar
2 tsp. baking soda
1/4 cup all-purpose flour

3/4 cup self rising flour
2/3 cup unsalted butter
1 cup pitted dates chopped

3 tbsp. orange juice
1 tbsp. honey
2 eggs large


Sauce:
1/3 cup butter unsalted 

1 cup heavy cream 
1/2 cup brown sugar 
1 tbsp. honey


Step 1: Preheat the oven to 350 degrees.  Then, mix two tablespoons of brown sugar and two tablespoons of shredded coconut and spoon it evenly into six small baking bowls. 
Step 2:  Sift the flours and baking soda together.  Mix the rest of the shredded coconut in too.
Make a well in the center of the flour mixture for the wet ingredients.
Step 3:  Meanwhile, stir the rest of the brown sugar, butter, honey, orange juice, and chopped dates in a saucepan over low heat until the butter and sugar have dissolved.
Step 4:  Fold the mixture into the flour until smooth.  It looks kind of unappetizing at this stage but don't worry -- we're not done yet.  Stir in the eggs.
Step 5:  Spoon the mixture into the little bowls and pop them into the oven for 35 minutes or until a toothpick poked through the center comes out clean.
Meanwhile, let's make the sauce...

Stir all the ingredients in a saucepan on low heat until the butter and sugar has dissolved.  Stir for another two minutes and then, serve on warm cakes.
Finished!
Enjoy!

Wednesday, March 7, 2012

Sugarlicious Giveaway!


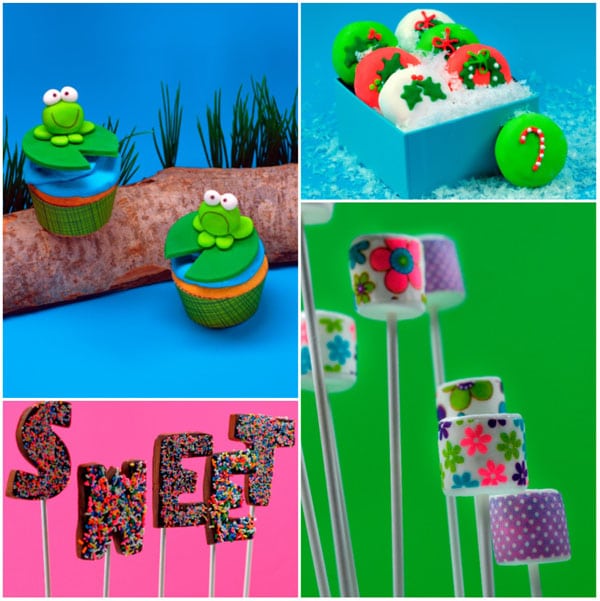
So, I know you all have been waiting for quite a while for the giveaway I mentioned in my last post and its finally here!  In celebration of 10,000+ views on my blog, I'll be giving away the cute book Sugarlicious by Meaghan Mountford of The Decorated Cookie.


The book shows how to make over 50 treats for any occasion that are fun and easy to make.  Sugarlicious is becoming extremely popular and would be a great addition to anyone's kitchen.


The rules to enter the giveaway are simple:
  1. Become a follower of my blog by clicking the blue "Join this Site" button on the right side bar.  Then, leave a comment bellow saying that you are a follower.
  2. Get an extra entry by spreading the word about this giveaway by mentioning it on your blog, Facebook, Twitter, you name it.  Leave another comment bellow with what you said on your site.
The giveaway will be open until March 25 at 11:59 PM (only because that's when school ends).  The winner will be chosen through random entry picking and will be announced on March 26th. 

Good luck to everyone!

Wednesday, February 22, 2012

Painting and Exciting News!


Hello everyone!

It's been a long time since I last blogged and as much as I'd like to put the blame on school and exams, I can only blame myself and my procrastination.  My first New Year's resolution to fail. :\  But, despite my recent lag in blog posting, I have not stopped trying new recipes and painting.  Hopefully, with the pictures I have stored on all those SD cards, I should have a couple more blog posts for you all before the month is over.


The two images you see here are a series of paintings I made for my mother.  The inspiration behind the images are photographs my neighbor's son took of places he has traveled to and the interior of a hotel he stayed in.  Each photograph was altered to include the miniscule details my mother wanted and I had a lot of fun doing that.  For example, the fountain in the first painting was originally a set of horse statues in Venice.  I changed it to a water fountain from Spain to get the style my mother wanted.

Side by side, the pictures look like this.
Now, the news I have been super excited to tell you all is that I am going to hold a giveaway on this blog soon!  What's the occasion you ask?

Well, this blog has almost reached 10,000 views and what a surprise that has been!  When I started my blog in 2010, I had no idea anybody (except my mom, of course) would even read it.  Now, people tell me almost every day that my blog inspires them to cook or bake, or they will tell me how much they love reading my sister and my posts.  Just that is more than any blogger could even wish for.  So thank you, everyone, for your support and look forward to an awesome giveaway very soon.

Monday, February 6, 2012

Cinnamon Chai Cream Pie


I recently came across this recipe while drooling over various food blogs. As a person of Pakistani descent, I thought chai-infused cream sounded familiar and warming. And since I've never made pudding from scratch before, I knew I had to try this.


I ran into a problem though: I didn't have one of the most crucial ingredients: chai concentrate. But after a quick Google search ("how to make chai concentrate") I made some of my own :)


It's the best thing ever- now when my parents want to drink chai all I have to do is mix this concentrate into steamed milk! So easy and mess-free. Plus, the spicy goodness makes the tummy happy.

Here's what I used to make the chai concentrate (recipe at the bottom):


Boil water. Add all the spices, remove from heat and steep for 15-20 minutes.

 
Strain the mixture to remove solids.


Pour into a jar...


Done! Now let the concentrate cool while you work on making the pie :)

Cinnamon Chai Cream Pie

Ingredients:

For the Crust:
  • 1/2 cup walnuts, toasted and finely chopped
  • 1/2 cup almonds, toasted and finely chopped
  • 3/4 cup graham crackers, crushed
  • 3 tbsp brown sugar
  • 4 tbsp butter, melted
For the Cinnamon Pudding:
  • 3 tbsp cornstarch
  • 3/4 cup brown sugar (or turbinado sugar)
  • 3 cups milk
  • 2 eggs, beaten and in a medium bowl
  • 1/2 teas cinnamon
  • 1 tbsp butter
  • 1 1/2 teas pure vanilla extract
For the Homemade Chai Concentrate
  • 4-½ cups Water  
  • 2 sticks Cinnamon
  • 1 piece Fresh Ginger Chopped
  • 8whole Cardamom Pods
  • 3 Star Anise Pods
  • 10 whole Cloves
  • ¼ teaspoons Freshly Ground Black Pepper
  • ½ teaspoons Freshly-ground Nutmeg (I didn't have this)
  • 1 teaspoon Orange Zest
  • 10 teaspoons Black Tea or 10 Tea Bags
  • 1/2 cup Brown Sugar
  • 1 Tablespoon Honey 
For the Chai Whipped Cream:
  • 1 Cup heavy whipping cream, chilled
  • 3/4 cup Chai liquid concentrate (sweetened), chilled
-----------CRUST------------

Place nuts on a baking sheet and toast for about 10 minutes in an oven preheated to 350 degrees F, checking often.  Remove from oven and allow to cool and remove the skins from the walnuts. Finely chop the walnuts and almonds.

Crush the crackers with a rolling pin like so:


Add brown sugar and butter, mix. Then spread mixture into a springform pan and bake for 12 minutes. Let cool.


------------PUDDING------------

Mix the brown sugar and cornstarch in a medium-sized saucepan over medium heat. Gradually add the milk, stirring constantly.  Cook and stir for 2 more minutes then remove from heat. 


Add cinnamon and stir.


Remove from heat. Add one cup of the pudding mixture into the bowl of beaten egg, mix well. Pour the egg mixture back into the milk mixture in the saucepan. 

Cook the pudding until almost bubbly, but don’t allow to boil.  Reduce heat and cook for 2 more minutes, then remove from heat.  Add the butter and vanilla, and stir. Pour the pudding mixture into the cooled crust. Freeze.


----------TOPPING----------

Prepare the chai topping by beating the cream and chai concentrate together until the cream forms soft peaks.


Spread chai cream on pie, top with chopped nuts and chocolate shavings.
     

    Enjoy! Freeze leftovers in an airtight container.


    © Best of Wardah. Made with love by The Dutch Lady Designs.