Sunday, January 15, 2012

Painting the Eiffel Tower


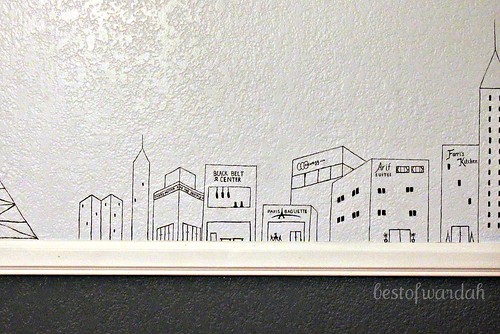
Last year, I painted a wall mural in my brother's room. We, my brother and I, decided to go with a black cityscape against the freshly painted snow blue walls. He gave me full rein as to which buildings to paint, as long as I included the Eiffel Tower. So, I decided to paint real and make-believe buildings that either held importance for the family or were his favorite places.

This corner of this wall is dedicated to the (make believe) "family-owned" businesses, including Farri's Kitchen, Arif Suites, and A.B. Computers. There is also a ferris wheel to complete the French theme.

The far left corner of the wall has some of my brother's favorite places to be including the Hershey's Factory, Costco, and a Ferrari showroom. He asked me to include a bank because his little city was missing one.

Last but not least, the middle of the wall, near the Eiffel Tower, had some more major names our family is accustomed to seeing almost daily; my father's workplace, Paris Baguette, my favorite bakery, and the Black Belt Center. A theater showing Harry Potter and the Deathly Hallows Part 2 was a must because my brother is a big fan of the series.

Practically every time someone first sees this mural, I get these questions.

1) Did you use a black marker to draw that?? Nope, I used black paint and a paint brush.
2) Why is there a plane flying directly towards the tower?! No, no, it's not like that! The paper airplane symbolizes my brother's dream to travel the world, France being one of his planned stops.

I hope you enjoyed this post! Leave a comment below letting me know where in the world you would like to travel to.


P.s. Look forward to a post about gorgeous zebra-inspired cakes soon!

Monday, January 9, 2012

Oreo 'n' Chocolate Wafer Cake


Here are simple instructions on how to make one of the easiest cakes ever. Not only is it put together in a jiffy (with absolutely no baking or cooking involved), but with its high-contrasting stripes of dark wafers and whipped cream, this cake is stunning and it tastes delicious too! But you have to be careful not to eat too much of the Oreo pudding during preparation, or you won't have enough left to frost the cake with!

My little sister Hajerah would like to be credited for making the beautiful cake displayed in these pictures ;)

Alright, on to the recipe!

Oreo 'n' Chocolate Wafer Cake
  1. 1 package Nabisco Famous Chocolate Wafers (9 oz)
  2. 2 cups heavy whipping cream
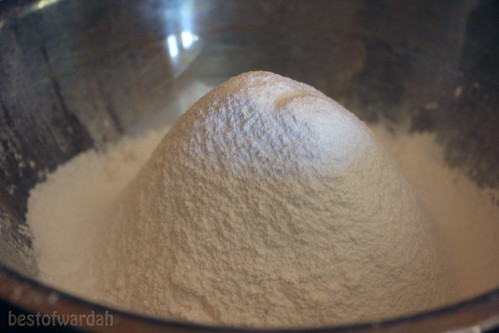
  3. 2 tbsp sugar, preferably powdered
  4. 1 package instant Oreo pudding mix (4.2 oz)
  5. 2 cups cold milk
STEP 1: Place the bowl and whisk attachment of a stand mixer (such as a Kitchen Aid mixer) in the freezer to cool them for better cream-whipping. After fifteen minutes have passed, remove the torture tools from the freezer and use the mixer to beat the heavy whipping cream and powdered sugar together until stiff peaks have formed.


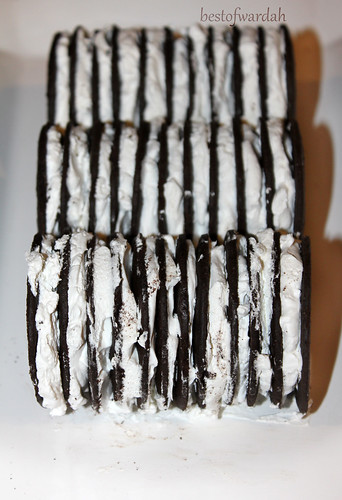
STEP 2: Spread two teaspoons of the cream on one side of a wafer and stick another wafer on the cream to make a sandwich. Repeat spreading cream and stacking wafers until you have a stack of 12 chocolate wafers, with cream in between them. Lay the stack on its side on a serving tray.


Repeat the process of stacking 12 wafers to make two more stacks and you will have three stacks of wafers lying side-by-side on the tray. There should not be any space between the stacks.

Take the remaining cream, spread it on the leftover wafers, and consume promptly. Consider this a test to find whether your wafer cake will be a success or not.

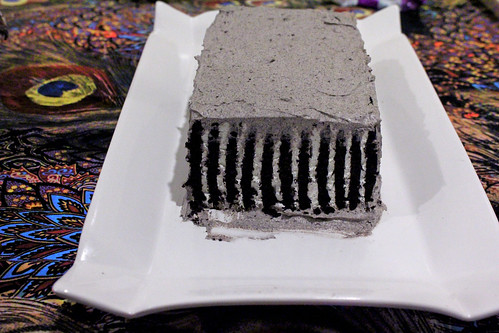
STEP 3: Prepare the Oreo pudding according to the instructions on the package (basically, whisk the cold milk and the pudding mix together until completely blended). Five minutes later, the pudding should be thick enough for you to pour it over the wafers and spread it evenly over the sides of the wafer stacks with a spatula.


Again, consume the remaining pudding. This is to keep you going for a bit, because the wafer cake must be refrigerated for a couple hours before you can eat it! Refrigeration is necessary to make the chocolate wafers soft and cake-like and to set the Oreo pudding.


This cake can be decorated or garnished however you like. My sister wanted to keep it plain and simple because once the cake is cut, the stripes are eye-catching all on their own! Oh yes, don't forget that you must cut the slices perpendicular to the wafers if you want to see this beautiful display in each slice of this yummy cake :)


Enjoy this super-easy chocolatey cake with a glass of milk or with friends, or both. Your friends will love you for sharing it!

Friday, January 6, 2012

Chocolate Banana Marble Bread


I've been making banana bread for years and years. But I use the same recipe every time, which includes whole wheat flour, dried cranberries, and walnuts. The bread turns out amazingly delicious, but I wanted to try a new recipe for banana bread. This new recipe calls for cake flour instead of whole wheat and the nuts are omitted. What sold me is the addition of cocoa powder to make beautiful chocolate swirls in every slice.


Recipe!

Chocolate-Banana Marble Bread
Ingredients
  • 2 large very ripe bananas
  • 1/4 cup buttermilk, at room temp.
  • 2 teaspoons pure vanilla extract
  • 2 cups sifted cake flour
  • 1 teaspoon baking soda
  • 3/4 teaspoon baking powder
  • 1/4 cup cocoa powder
  • 3 tablespoons boiling water
  • 1 1/2 sticks unsalted butter, softened
  • 1 cup sugar
  • 2 large eggs, at room temp., lightly beaten
STEP 1: Preheat oven to 350°F. Lightly coat a 9 by 5-inch loaf pan with melted butter and line it with parchment paper that extends 1 inch beyond the long edge of both sides of the pan.

STEP 2: Mash bananas and whisk in the buttermilk and vanilla until just blended, set aside. Sift the flour, baking soda, and baking powder together into a medium bowl. Whisk to blend well, then set aside.

Place cocoa powder in a small bowl. Add the boiling water and mix thoroughly until the mixture falls off a spoon in a thick glob. Set aside.

STEP 3: Place the butter and sugar in the bowl of a mixer stand and beat until blended. Add the egg mixture, one teaspoon at a time, waiting for the egg to be completely mixed in before adding in the next spoonful.

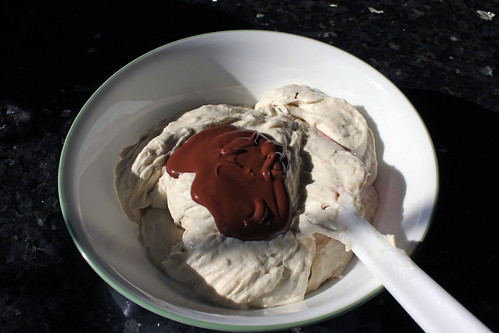
STEP 4: Separate half of the batter into a medium bowl. Add the cocoa mixture and gently blend until mixed.
 
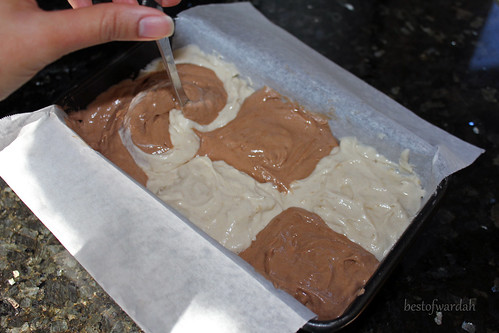
STEP 5: Drop alternating spoonfuls of dark and light batters into the prepared pan.


Then marbleize by using a spoon to turn the batter over in three place down the length of the pan.


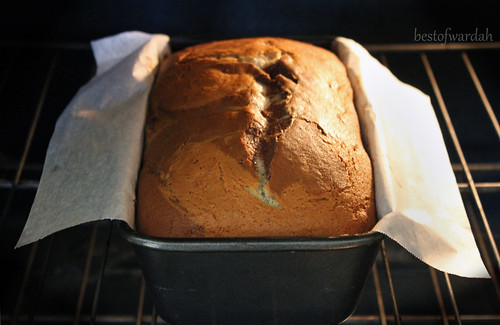
STEP 6: Bake the banana bread for 55 to 65 minutes, until firm to the touch and a toothpick inserted into the center of the loaf comes out clean.


Transfer to a rack to cool completely. When cool, remove from pan, peel off the parchment paper, and cut slices by sawing gently with a serrated knife.


Enjoy!

Mehwish


Wednesday, January 4, 2012

Herbed Chicken Pot Pie

There's only one week of winter break left, and I am going to make the most of it- by spending more time in the kitchen.

Today, I was flipping through Sur La Table's book The Art and Soul of Baking when I came across a mouth-watering photo of chicken pot pie. I've never made this dish myself, so I decided to finally try it. The outcome was a success; my entire family approved (surprisingly) and I thought my pie crust tasted especially good with the savory pie filling.


Try this recipe out for yourself! You'll thank me.
Make sure you wear an apron though, because some of the whisking gets a little exciting ;) I found this apron that I decorated when I was younger. It doesn't really fit anymore, but it helped protect my awesome T-shirt from flyaway peas and flecks of butter.


Now you're ready for the recipe! I've made some changes, because my family members would never eat this if it wasn't spicier.

For the filling you will need:
  1. 3/4 stick butter
  2. 6 tbsp all-purpose flour
  3. 4 cups chicken broth
  4. 1 tbsp olive oil
  5. 1 lb cooked chicken meat, diced
  6. salt, black pepper, red pepper (1 teaspoon each)
  7. chopped parsley, thyme, and chives (around 1 tbsp of each)
  8. veggies:
    10 oz. sliced mushrooms
    1 cup frozen peas
    1/2 cup diced carrot
    1 cup diced onion
    1/2 cup diced celery

STEP 1:
Melt butter in a saucepan. Add the onion and celery, and stir occasionally until softened (5-7 min).
Remove pan from heat and whisk in the flour. Return to heat and cook for 3 minutes, whisking to keep the flour from turning brown.
Remove pan from heat and add 1 cup of broth. Whisk until the mixture is smooth and paste-like.
Make sure there are no lumps of flour, then whisk in the remaining 3 cups of stock.

STEP 2:
Return to heat and bring to a boil. Add carrots and simmer for 5 minutes. Remove from heat.

STEP 3:
Heat the olive oil in a saute pan. Add the mushrooms and cook until deep golden brown (10-12 min).
Mix the mushrooms, chicken, peas, parsley, thyme, and chives into the filling. Add the seasonings.
Set the filling saucepan in a large bowl filled halfway with ice water. This is to chill the filling so that it doesn't melt the flaky pie dough when it is placed on top of the pie.

STEP 4
Preheat the oven to 375°F.
Scrape all of the filling into a pie pan and cover it with pie dough. I made my own pie crust, but you can also buy it ready-made at a grocery store.


In a small bowl, beat an egg yolk with 2 tbsp of milk and use a pastry brush to brush this glaze across the surface of the pie.

Bake for 40-45 minutes until the filling is bubbling and the crust is crisp and golden-brown. Transfer to a rack and cool for 15-20 minutes. Serve hot, spooning filling and crust into wide, shallow bowls. Enjoy your chicken pot pie!

Sunday, January 1, 2012

An Artistic Start to a New Year

This picture was taken on an ostrich farm during my holiday vacationing.
Happy New Years, everyone! With the coming of the new year, new hopes, aspirations, and resolutions are also made by many of us. For some of us, a new year is a new beginning, a chance to make new friends, choices, decisions and so much more. In fact, I intend to make serious life style changes myself, the biggest being to make at least one blog post per week! Let's hope I can actually complete this resolution.

Some of you may be wondering why I've included a picture of some curious looking ostriches taken during my vacationing. Well, ostriches are very related to what I am about to share with you today. I am very excited to show everyone a unique project I have been working on for the past couple of months. I have been painting genuine hollowed ostrich eggs as home decorations!


Ostrich eggs are a very beautiful and creative way to decorate one's home or work space. Not only do they make beautiful centerpieces and great conversation starters, but they're also perfect for gifting to loved ones. With many holidays to look forward to in the new year, such as Easter and Mother's Day, what better present to give than a lasting piece of art?

The egg looks beautiful in a gift box.
In fact, this egg in particular, I painted for my uncle's 20th wedding anniversary. Both my aunt and uncle were pleasantly surprised and very happy with the present. The care they showed towards the freshly painted egg made me smile. I have completed a few other eggs and will update you about them very soon.


I created this image with a vintage floral background with Gothic additions. The image I had in mind was a background that allowed the beautiful Arabic calligraphy to stand out; something that would complement it, such as the contrast between muted yellows, peaches, and pinks and bold black, red, and orange. The vibrant butterflies and colorful detail in the flowers allowed the entire piece to stand out beautifully.

This definitely won't be the last you will be hearing about these ostrich eggs from me!


P.s. If you want one of these beautiful babes (pun not intended) for yourself or a loved one, then email me at warif93@gmail(dot)com for more information.
© Best of Wardah. Made with love by The Dutch Lady Designs.